
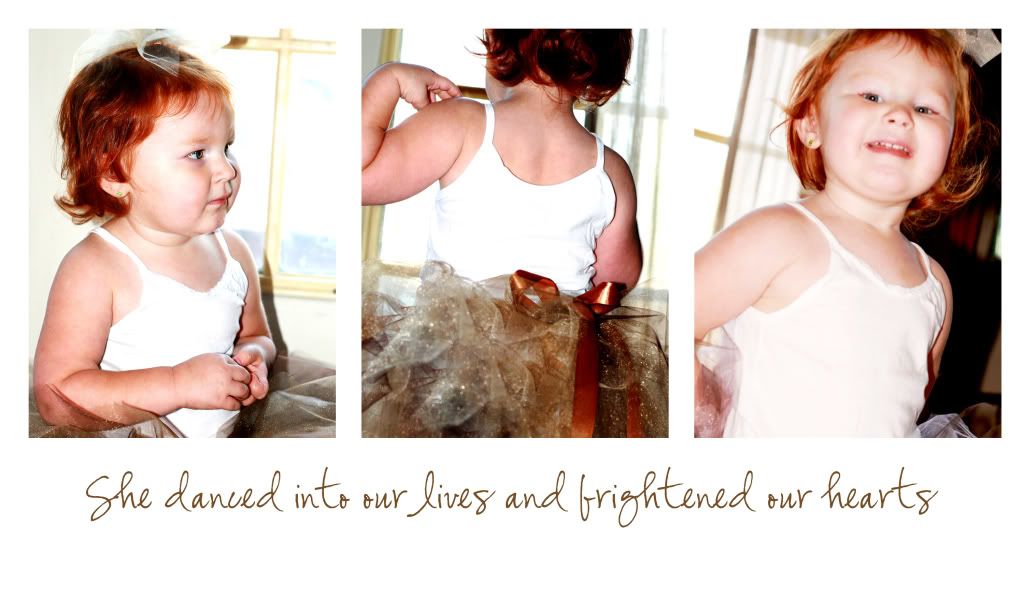
 I love storyboards. They are a great way to show off several corresponding pictures all together, plus a cute little saying to top it off! So let's learn how to make them. It's really, really easy and completely customizable. So let's start with a new document. I chose 10x6 but you can do any size you want.
Then we are going to want to add our squares. Add a new layer first. Then select your rectangular marquee tool on the side tool bar. We want to do a fixed size so we don't have to worry about matching up our squares perfectly. To do this, go to the top tool bar and click where it says normal in the drop down menu, switch it to fixed size. I chose 3 in x 4in but you can do whatever you want. Click on the document and you will see your rectangle pop up.
We now want to fill that area with a color. So while the rectangle is still highlighted go to Edit/Fill Selection.

A box comes up and if your foreground color isn't black, click d and that will turn your foreground color to black. Then click ok. Our rectangle is now colored in.

Now that the first one is done, click ctrl+j to duplicate it. Do that twice. Now there are three rectangles. Now you'll need to select all of them at the same time. Click on one while holding the shift key and then click on the rest of them.
Now to align them. With all of them highlighted, go to the top of the screen and you'll see an align button, click that and choose top edges. Then under distribute (right next to it) choose horizontal centers. They are now aligned and we can add pictures.

Choose the images you want to use, make your corrections and drag the first one over. Choose in your layer palette which rectangle you want your image to become (left, center or right). Move your image above that one and click crtl+g. Your image now became that rectangle. Resize as necessary and repeat for all three.

You now have a story board. You can now add a nice saying, a shape, embellishments, brushes, or leave it blank. It's all up to you. Have fun!!!


1 comment:
Hi Jessica.
where do you get your storyboards printed? I have a 10x6 that I want printed on a foam core but cannot find where to get that size printed.
thankyou!
Jodi
Post a Comment